Been putting off hanging those prints you’ve had sitting around recently? Not sure how to get a perfect finish to your gallery wall? I called up my Dad, handyman extraordinaire, to get the lowdown on the best way to fill your gorgeous walls with perfectly hung prints! Here’s his tips and best practices for hanging prints that are properly measured, evenly spaced, and perfectly level. This guide is based on hanging one of my frames, but should apply to most simple framed prints, and includes tips on correct tools, hardware and wall-types when hanging prints. Ready to get hanging perfect prints?

Top Tips for Hanging Prints Perfectly!
Check for Risks

Before you start making holes in the wall and firing up power tools, it’s important to make sure you’re safe! You can use a stud finder tool to help you locate cables in the wall, and it’s wise to investigate the location of gas pipes and any water pipes too before you start, so you can avoid any nasty (and dangerous) surprises. It’s usually a good idea to avoid drilling above or below sockets, light switches and other electricity points, too, for the same reason. If you’ll be needing a ladder, be sure to choose an appropriate ladder for the task, and be aware of the instructions for safe use. Always be sure to clear the area of trip hazards, and keep tools in a safe spot away from children and pets. When using any tools - particularly a drill - be sure to familiarise yourself with it’s instructions for safe use before starting.
As ever, if you’re unsure about anything, it might be best to contact a qualified tradesperson to do the work instead.
Know Your Walls!
It can be very helpful to know what kind of wall you’re working with to help you choose suitable tools and fixings before you start. Brick walls will more than likely require a drill, screws and plugs, whereas plasterboard might only need an appropriate fixing and a screwdriver. With this in mind, it’s best to find out exactly what kind of wall you’re working with, but as an extremely loose rule of thumb, in the UK older houses tend to have brick walls - particularly on the “outer” walls, whilst new builds are more likely to have some Plasterboard or Dot-and-dash walls. You can often identify plasterboard walls based on whether they sound hollow when tapped.
Another note about old houses - please take serious care to ensure that walls are free from Asbestos or Lead paint before you start, as the dust can be hazardous to your health.
Assess the Weight

You can use picture hanging nails for very lightweight frames, but larger frames should be screwed into the wall with a drill and a rawl plug. Bear in mind that if you choose to hammer nails in, you may end up hitting the brick below the plaster, in which case you might struggle to get a nail in cleanly. Most of my frames (other than A2 size) are fairly lightweight, but screws are preferable for a more secure finish. Also, though plasterboard fixings are quite effective, it’s wise to stick to picture frames and light mirrors when using them. In some “New Build” homes, the walls are plastered with “dot-and-dab” style plasterboard, in which case it might be worth checking out some purpose-made “dot-and-dab” fixings for heavier frames.
Get the Right Supplies

If you’re drilling into your wall, be sure to use a masonry bit for your drill, and try to pick one on the smaller side - the smaller the hole, the less likely you are to damage your walls. For brick walls, you’ll want to use screws and a rawl plug to keep things well-anchored. For your average picture frame, a 5mm or 5.5 rawl plug is usually sufficient (a smaller hole is less likely to to damage your wall and create mess). Match your drill bit size to the size of your rawl plug, and choose a screw that is on the small size (3.5 - 4 mm diameter, 35 - 50mm length), but keep in mind that the heavier the frame, the bigger the screw, and that these sizes are just a guide.
For plasterboard walls, try a set of plasterboard fixings which help to keep screws anchored in the soft plasterboard - you might need to drill a small hole for these, but sometimes you can even screw them in by hand with a little elbow grease.
How to Hang Prints So They’re Straight and Even
Here’s some essential must-dos to be sure your prints are hanging straight, even and exactly how you envisioned them.
Measure Up!
The best way to hang prints perfectly straight is to make sure you measure appropriately. Grab your tape measure, a pencil and a calculator - we’re doing some maths!
First, decide roughly where you’ll want your prints to hang. Is it one statement piece positioned in the centre of the wall? A certain distance above the sofa? Maybe you’re planning a gallery wall? Whatever you’ve decided, you need to know roughly how you want them to sit. Try to find some reference points to start measuring from - for example: the furniture or walls either side of the space you’ll be hanging them.
Next, you’ll want to decide on the height at which you’re hanging your print. If you are particularly tall or short, it might be worth double checking that “viewing height” for you, might not necessarily translate to what looks best in your space, so be sure to play around with heights before you commit to making any holes in walls. That being said, your home ought to be your paradise, so if pictures that hang at your perfect viewing height are what make you happiest, then you should absolutely hang them there!
Once you’ve chosen the optimal height, you’ll want to measure it up perfectly. First, you’ll need to measure the distance from either the floor or the ceiling, to the upper edge of your frame. Then, you’ll measure the distance from the edge of your frame to the hanging fixture on your frame. If you started measuring from the ceiling, you’ll add both measurements together. If you started measuring from the floor, you’ll minus this number from your first measurement. This total number gives you the distance from the floor or ceiling that you should put your nail or screw.
Next, you’ll need to find the centre point from whichever reference points you were using - for example: the exact middle of your sofa, or the distance from the door and the bookshelf. Measure the entire width, and divide by two, and you have the exact spot horizontally to put your nail or screw.

Measure these up again and mark the spot lightly with a pencil. At this point it’s probably wise to measure again to be sure - nobody wants to be making more holes than necessary in their walls! Remember - Measure Twice, cut (or Drill!) once!
Time to Commit!
Use this little pencil mark as a guide for where to make your hole, they you can start putting your fixings into the wall!
If you are drilling into brick walls
Remember to take care when drilling and keep your fingers well away from moving parts. Then add a rawl plug to the hole and screw in the screw. A good tip is to tap the screw head with a hammer slightly before screwing in the screw - it helps it to grip in the brick rather than the plaster.
If you are drilling into plasterboard
Try to keep the hole small, then gently tap in a plasterboard fixing with a hammer, and screw it in the rest of the way with a screwdriver. Be sure to take care of how close you are to any corners - plasterboard walls have timber studs inside at various points, which you will probably struggle to screw into with a plasterboard screw. Instead, you can use a normal screw and screw in by hand. If you’re not strong enough for that, you can drill a small guide hole to start you off. You should also be aware that they have a strip of metal beading at the corners (about 25mm wide) so be sure to avoid screwing into these areas.
Once the screw is in, all you need to do is hang your print! My frames come with a little toothed hook to help them slot easily onto a hook without wobbling, but more traditional frames might come with a picture wire instead.
If you’re hanging more than one print (such as a triptych of prints or a gallery wall) you can use this same method, though the maths is a little more complicated. Be sure to take into account your desired distance between prints when calculating where to put your fixings!
Dad - Approved Tips & Tricks for Hanging Prints
For frames with more than one bracket
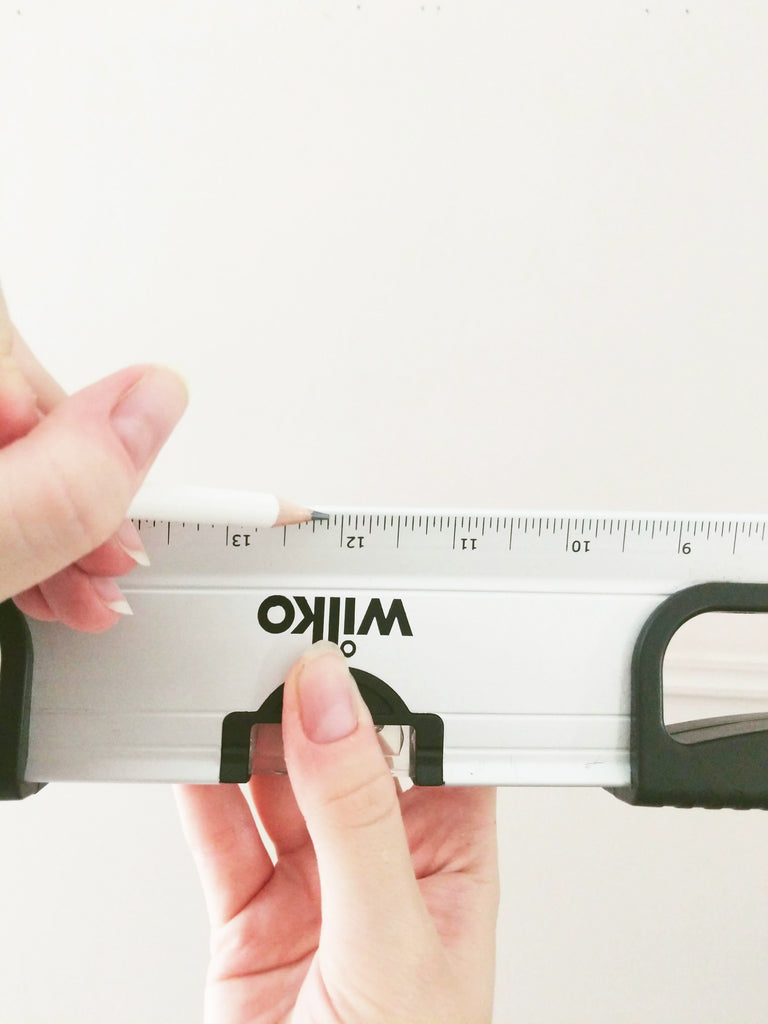
If your frame has more than one fixing bracket (for instance, larger size frames, or landscape frames) it can be tricky to ensure both holes are level. Here’s a great tip to get them perfect:
Line up a spirit level with the brackets on your frame, and use a light pencil mark onto your spirit level to mark where abouts each bracket is. Then, measure the middle point between these marks, and make a pencil mark for that too, on the spirit level. Then, line that central mark up with the central mark on your wall. Ensure the spirit level is showing as level, and copy the bracket marks on your spirit level onto the wall. This will give you perfectly level markings that are the perfect distance, and perfectly centred, for you to start making your hole in the wall.
For safety and less mess
Drilling into walls creates dust, and it’s definitely not advisable to breathe this in - plus it’s likely to mess up your nice clean walls or carpet. A great tip is to rope in a friend to hold the hose of a vacuum cleaner a few centimetres below the spot you are drilling whilst it switched on, which will suck any falling dust immediately away into the vacuum cleaner. Please always take care to keep any hands well away from moving drill parts.
Additionally, when drilling into walls, it’s advisable to wear a dusk mask and safety glasses to protect your eyes and airways from the dust. These can be found at virtually any home improvement shop.

One Final Note
Just a small disclaimer, that though this method has been helpful to me, I am not an expert, and powertools, ladders and other DIY equipment are always used at your own risk. If you are in any doubt whatsoever when hanging prints or making holes in your walls, it is always advisable to reach out to a qualified tradesperson instead. You should always be aware of where you are choosing to hang artwork - be sure to place them where they can’t be a danger to children and pets, and fasten them securely to prevent any falling hazards. Always research the correct fittings and fastenings to suit your wall, and never use power tools, ladders and other DIY equipment without first familiarizing yourself with the proper, safe instructions for use.
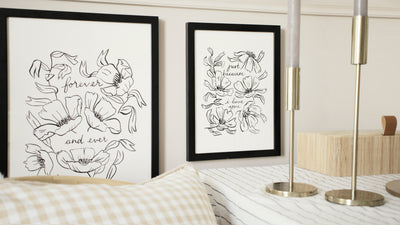
Ready to Get Hanging?
Check out my selection of illustrated prints that are perfect for filling up empty wall. Happy picture hanging, friends!